How Many Different Methods Are There to Fluid Art
This postal service may contain chapter links. We may earn a modest commission from purchases made through them, at no additional toll to you.
You always wanted to be creative and create your ain artwork or painting, but you are afraid to make the attempt? Or you are not actually talented in classical painting or drawing? You likewise love surprises and the unpredictable? So Fluid Painting could be just the right thing for you! What exactly this is and how it works, y'all volition learn on this info website.
Table of Contents
- 1 What is Fluid Painting?
- 2 Acrylic Pouring Technique
- 2.1 Spectacular Cell Formation
- 2.2 The Materials for Acrylic Pouring
- 2.three The nigh important Pouring Techniques
- iii Resin Art Techniques
- iii.1 The Versatility of Epoxy Resin
- 3.2 Nuts and Materials of Resin Art
- 4 Alcohol Ink Technique
- four.one Nuts and Materials for Working with Alcohol Ink
- 4.2 The use of alcohol ink and blending solution
What is Fluid Painting?
Fluid Painting, the art of "liquid painting", is as simple as information technology is fascinating: instead of working with classical tools, the artist applies the colors in a liquid land to the canvas. In doing so, he uses cups, clasp-falses, pipettes or disposable syringes. The result is not only impressive, simply above all one thing: quite unpredictable. This is what makes Fluid Painting so fascinating.
With this simple technique, even beginners can create beautiful works of art and you don't demand any creative talent in the true sense of the give-and-take. Nevertheless, there are some things y'all should go along in mind. This information page about Fluid Painting will help you to be well prepared for your first ain artwork.
There are three different Fluid Painting techniques: Acrylic Pouring, Resin Art and the Alcohol Ink technique:
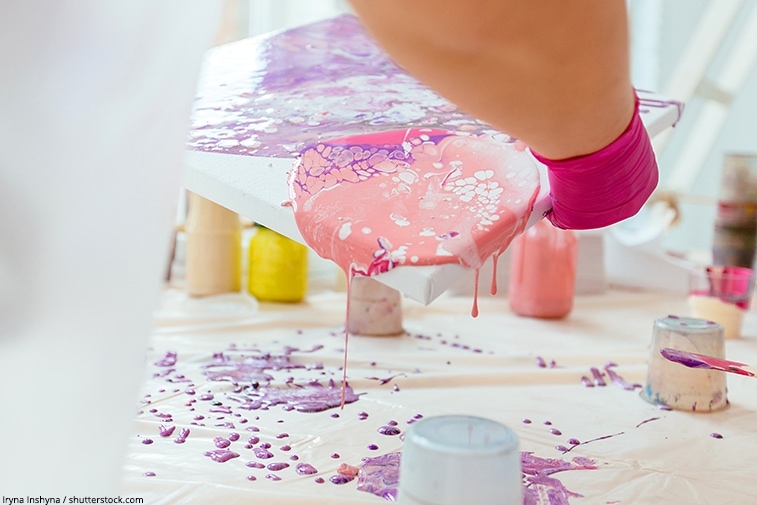
Acrylic Pouring Technique
This technique, too known equally Cascade Painting, means painting with liquid acrylic colors. Nevertheless, the pigment used must not be also liquid either. In addition, it should of course retain its luminosity. To achieve this, you dilute it in a certain ratio with a then-called pouring medium. In improver, this technique uses silicone oil to create fascinating cells.
The choice of the Pouring Medium used in Acrylic Pouring is primarily a question of personal taste and must be tried out quite only. One type of pourer can cope with pouring mediums that do not produce the desired results in the other. Test different media and follow your personal preference. There are countless professional and alternative pouring media on the market.
Water for dilution should, in dissimilarity to the classical acrylic painting, but be used to a pocket-sized extent, because the color motion-picture show can tear when drying and the colors can lose some of their intensity. The pigments of the paint are only insufficiently leap together by water. With the help of the pouring medium, nevertheless, non only are the menstruation properties of the ink positively influenced, but the ink also retains its luminosity and no cracks occur during drying.
The perfect mixing ratio is to a higher place all one affair: a matter of practice. Beginners can first mix ink and medium in a cup in a ratio of 1:one so approach the perfect consistency step by step. If the paint is not too liquid and flows sluggishly, similar liquid honey, the ratio is right. After mixing, the paint is practical to the canvas. Usually cups are used for this. Then the artist makes sure that the different shades of colour flow into each other. For this purpose he moves the canvas and tilts information technology in dissimilar directions.
Spectacular Cell Germination
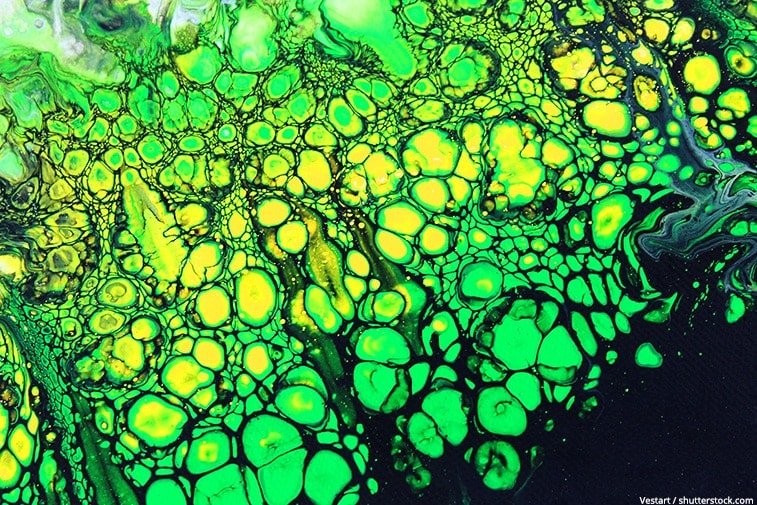
The special thing well-nigh this painting technique is the jail cell formation. Each mixed shade has its own density. This causes the colors to displace each other and jail cell patterns of dissimilar sizes are created when they run across. These are unpredictable and requite each finished work of fine art its own fascination. To back up the cell formation, you tin can add a fiddling silicone oil to the colors and blow-dry them after application.
The result is astounding in any example and the design is very simple. The material and cost expenditure is also kept within limits.
The Materials for Acrylic Pouring
To get started, you should get all the materials yous need. Running back and along in the heart of information technology all considering yous've remembered that you want to torch the already spreading paint with the Torch is not much fun. Hither is an overview of the nigh important materials for the acrylic period technique:
- Canvas or wood painting basis
- Acrylic paintings
- Pouring Medium
- Silicone oil
- mixing cup
- Wooden spatula
- Distilled water squeeze bottles
- Torch or Hot air gun
- Safe gloves
- Kitchen towel
Protect your workplace, if you lot exercise not have your own studio, with protective foil or thick paper. Ventilate the room well. At present y'all can start!
The most of import Pouring Techniques
There are many different techniques for fluid painting with acrylic paints. Depending on which ane you choose, completely different works of art are created. And each of them has its own special fascination. Here are the virtually important techniques briefly explained:
Flip Loving cup
For this technique you pour the colors on top of each other or one later on the other into a cup. Optionally, you tin can add a few drops of silicone oil to the individual colors for better cell germination. Then you turn this layered cup over and cascade the whole matter onto the painting footing at once. For simplicity, you can too place the painting ground on the cup so plow them over together. Then lift the loving cup advisedly and the paint will pour over your canvass. You can control the flow of paint by tilting the canvas.
Puddle pour
With Puddle Pour you do not pour the colors onto the painting ground at the same fourth dimension, only ane after the other and in a higher place all into each other. This creates, equally the name suggests, a kind of puddle in the middle of the canvas. Then you lot let the colors glide over the painting according to your taste. If you have mixed silicone oil into the colors, fascinating cell effects are created.
Dirty Cascade
Similar to the Flip Loving cup, the colors are put into a cup where they are layered on top of each other. The colors are stirred briefly, but never until they are completely mixed. You don't turn the cup completely upside downwardly like with the Flip Cup and thus cascade the pigment completely onto the painting footing, only slowly and carefully. In doing so the cup empties itself bit by bit.
Swirl Pour
Hither you lot also mix the colors in a cup to cascade them out with even and band-shaped movements in the centre of the sail. This creates exciting circular shapes. Since these are reminiscent of tree rings, this technique is also called Tree Ring Pour. A steady mitt is indispensable. This method has something meditative about information technology and y'all should definitely take your fourth dimension for information technology.
Swipe
The Swipe technique is suitable for conjuring cracking prison cell effects, only similar the Puddle Cascade. First y'all bring your color-mixtures on the canvass as you similar. At one finish of the canvas y'all then spread white (or another color with lower density) in a line. This color is then advisedly drawn beyond the canvas with the assist of a wet kitchen newspaper, squeegee or painting knife. The great matter about this method is the fluid movement you can create. Usually silicone oil is used for the Swipe, considering the near important thing too the flowing look is the cell germination.
Air Swipe / Dutch Cascade
With the Air Swipe the colors are spread over the canvass with the assistance of a hairdryer or a straw. The colors tin be applied as FlipCup or Puddle Pour on the painting ground. A negative color (usually white or black) is so distributed around the upside-down cup. Afterwards the cup is moved slowly over the canvas and at the same fourth dimension lifted gradually then that the colors can flow out. Finally, the colors are diddled over the canvas with a hairdryer or harbinger – creating breathtaking patterns.
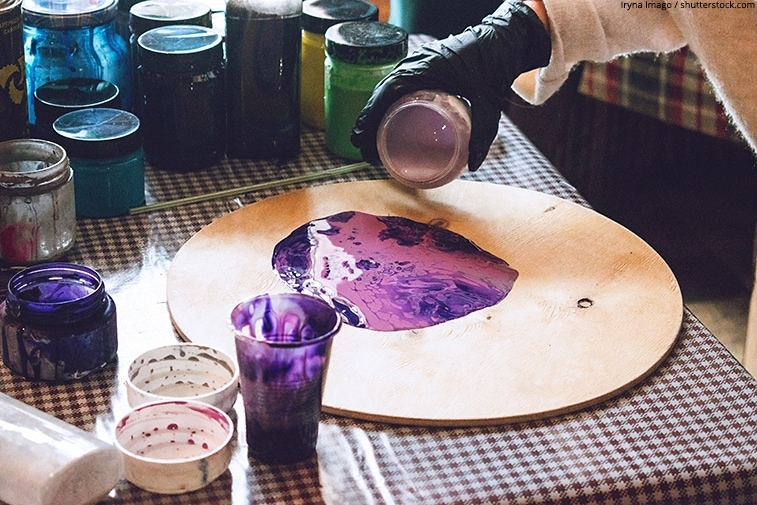
Resin Art Techniques
Resin is also known as Epoxy Resin. The whole is a 2-component system where resin and hardener are mixed. It is simply through this mixture that the material tin can harden and become a solid plastic with a high-gloss, clear surface.
The Versatility of Epoxy Resin
The not bad reward of Epoxy Resin is that it is extremely versatile. The material is quite robust and easy to clean. If it is mixed with colour pigments or metallic pigments, you tin create scenic works of art with an unmistakable brilliance and depth. Likewise beautiful paintings, resin can as well be used to create great unique pieces of art such as decorative pieces of all kinds, furniture such every bit Epoxy River Tables, pieces from Epoxy and wood or beautiful resin jewelry. Another awarding in resin art is the production of exciting Petri Dishes and sparkling geodes. But resin is not only used in art – information technology is also widely used in industry, handcraft, model making and gunkhole building. Last but not to the lowest degree, epoxy resin can too be used to produce very modernistic and noble floor coverings.

Basics and Materials of Resin Art
For the Resin Art Technique y'all demand different materials and equipment. What yous demand depends on what exactly you want to create. Making an epoxy table has a completely dissimilar starting point than making a painting. If you want to cast petri dishes or castings in full general, y'all will need boosted moulds made of silicone.
For resin artwork you need the post-obit materials and equipment:
- Resin or epoxy resin
- Color pigments in liquid or pulverization course
- Forest painting grounds
- Mixing cup and spatula for stirring
- Spatula or painting knife
- Bunsen burner or hot air dryer
- Isopropyl alcohol, silicone oil or Resi-Blast
- Spirit level and household paper
- masking record and protective flick
- Nitrile gloves, safe goggles, animate protection
Y'all shouldn't use canvases for the resin art. Canvases are not strong enough and also thin for the rather heavy resin and make sure that the resin would collect and sag in the middle. You should too not utilise a painting surface that could absorb the resin. The best choice is a painting ground made of wood. Of class it should be primed.
As colors yous should only apply suitable pigments for resin. With this technique it is besides very important to protect your workplace and yourself. Considering in a liquid state the material is relatively poisonous and therefore dangerous to health. When hardened, even so, resin is completely harmless and nearly brands are even food safe.
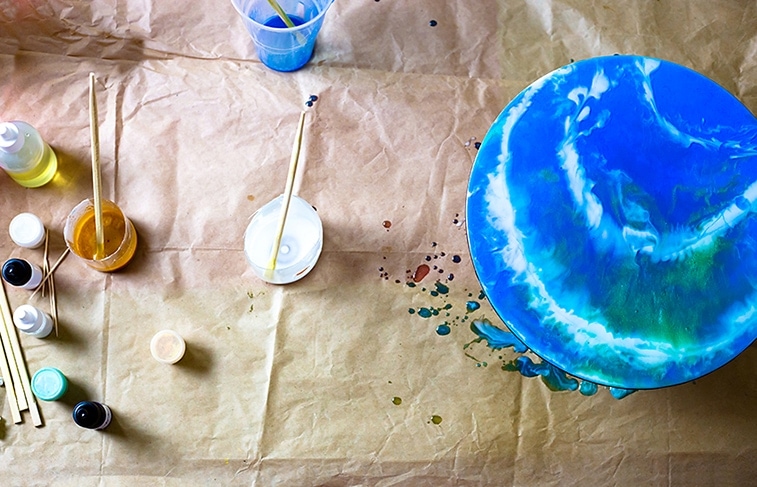
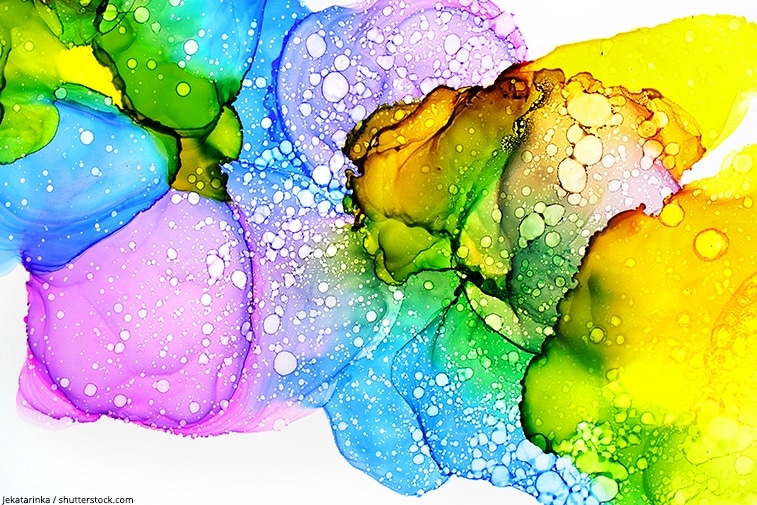
Alcohol Ink Technique
Similar Acrylic Pouring, this technique originates from the Americas and is at present becoming increasingly pop in Europe as well. The reward of this method is that the alcohol contained in the colors evaporates very quickly, but new alcohol tin be added over again and again. Thus the practical colors can be changed again and over again.
Basics and Materials for Working with Alcohol Ink
The materials needed for the Alcohol Ink technique are the following:
- Alcohol Inks
- Blending solution or isopropyl alcohol
- Yupo paper or Stone Newspaper
- Spray bottles
- Drinking straws or borehole blowers
- Hair dryer with cold setting
- Permanent marking
- Universal varnish
- Rubber gloves and animate protection
The Blending Solution is a specially developed solution for this technique, which allows you to apply exciting color gradients and brightening. Information technology is not a must, but it makes your artwork even more unique.
Yupo newspaper was also developed for this painting technique. It has a particularly smooth surface and is waterproof. These properties are very important for painting with alcohol colors. An alternative, especially for beginners, is the Stone Paper, which is produced ecologically and is cheaper. Another cheap alternative are ceramic tiles as painting ground. Subsequently your piece of work of art has stale, you can add some details to it with the aid of the permanent markers. This gives your painting an even stronger expressiveness.
If y'all use a hair dryer with cold setting as an aid, you tin can too create beautiful color gradients. You lot can also use a drill hole blower for this. For the get-go, nonetheless, a straw will also do. With spray bottles you can let off a fiddling more steam. Remember to article of clothing a breathing mask when using them!
The apply of booze ink and blending solution
Get-go you employ a few drops of Blending Solution or Isopropyl alcohol 99.ix% on your painting ground. At present drip the alcohol ink onto it – just every bit you like. Endeavour yourself and see how the result will look like. You can besides utilise the alcohol ink without Blending Solution directly onto the painting surface. Employ several dissimilar colors and advisedly place drops next to drops. These first spread out in a circumvolve. If they touch each other, they see each other, readapt each other and ever gear up new colour accents. If you have used several colors, you tin can also apply some of the Blending Solution or booze again. This forms a colorless circle which displaces the ink. Continue until your artwork is consummate.
This exciting painting technique lives from trying out. Without trying out, neither works of art nor new techniques are created. With our detailed instructions for the Alcohol Ink technique you tin learn the nuts of this fascinating art and give your creativity gratis rein. Yous volition be amazed what incredible works of fine art you tin can create!
Source: https://fluid-painting.com/en/fluid-painting-guide/#:~:text=There%20are%20three%20different%20Fluid,What%20is%20this%3F
0 Response to "How Many Different Methods Are There to Fluid Art"
Post a Comment